Guide to Drip Edges for Shingle Roofs
Table of Contents
- What’s the Purpose of Roof Drip Edges?
- Drip Edge Material Types
- Drip Edge Profile Types
- How to Install a Drip Edge
- How to Replace a Drip Edge on an Existing Roof
- FAQ
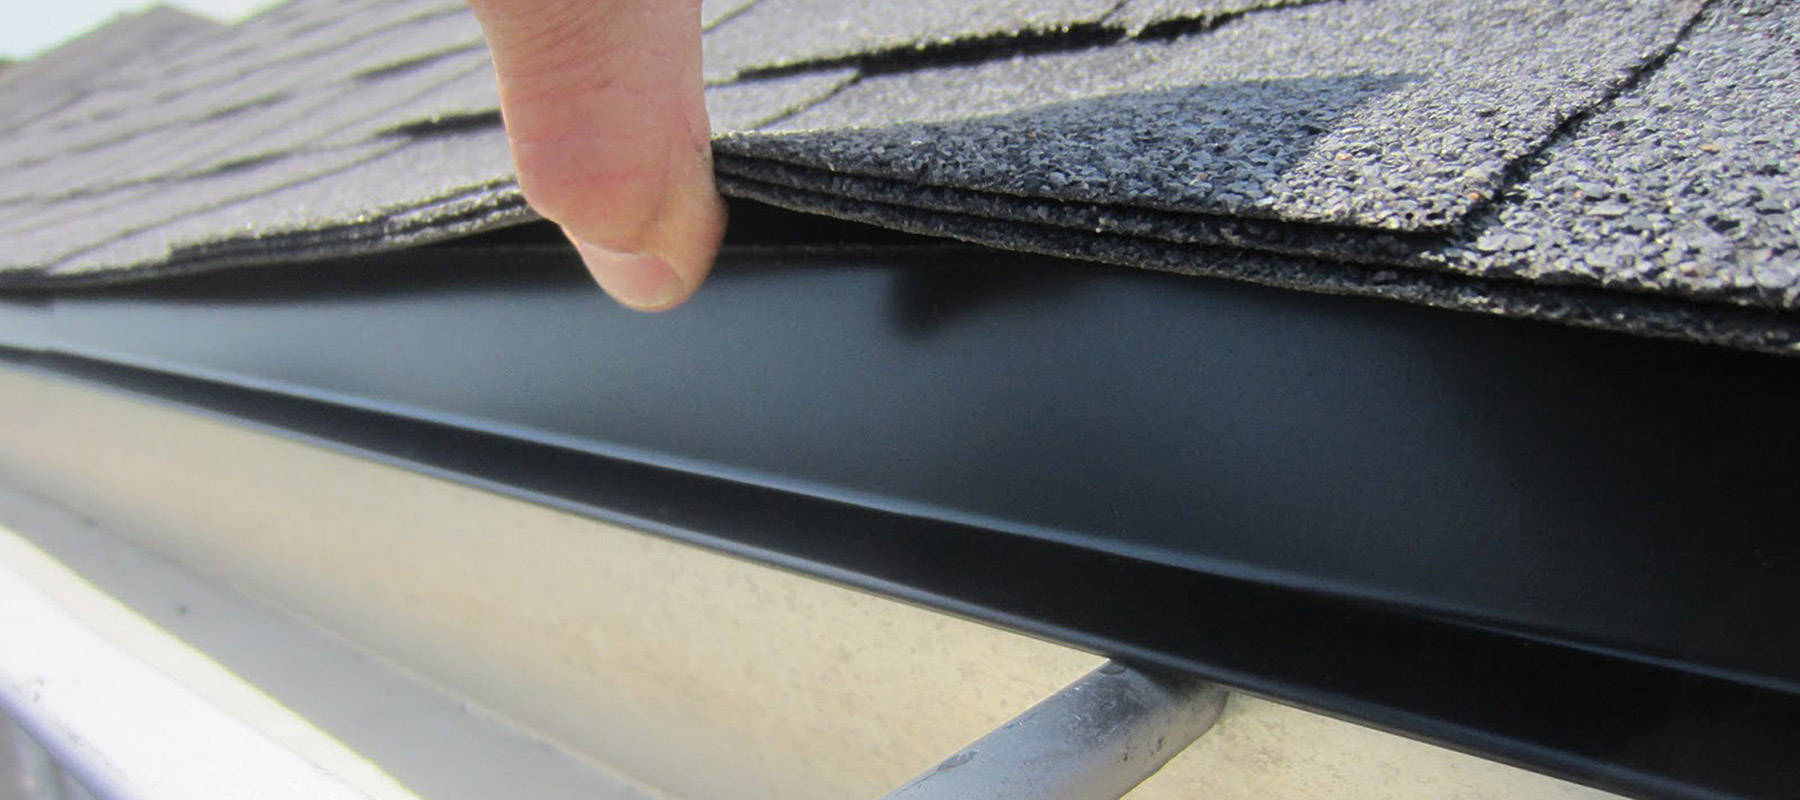
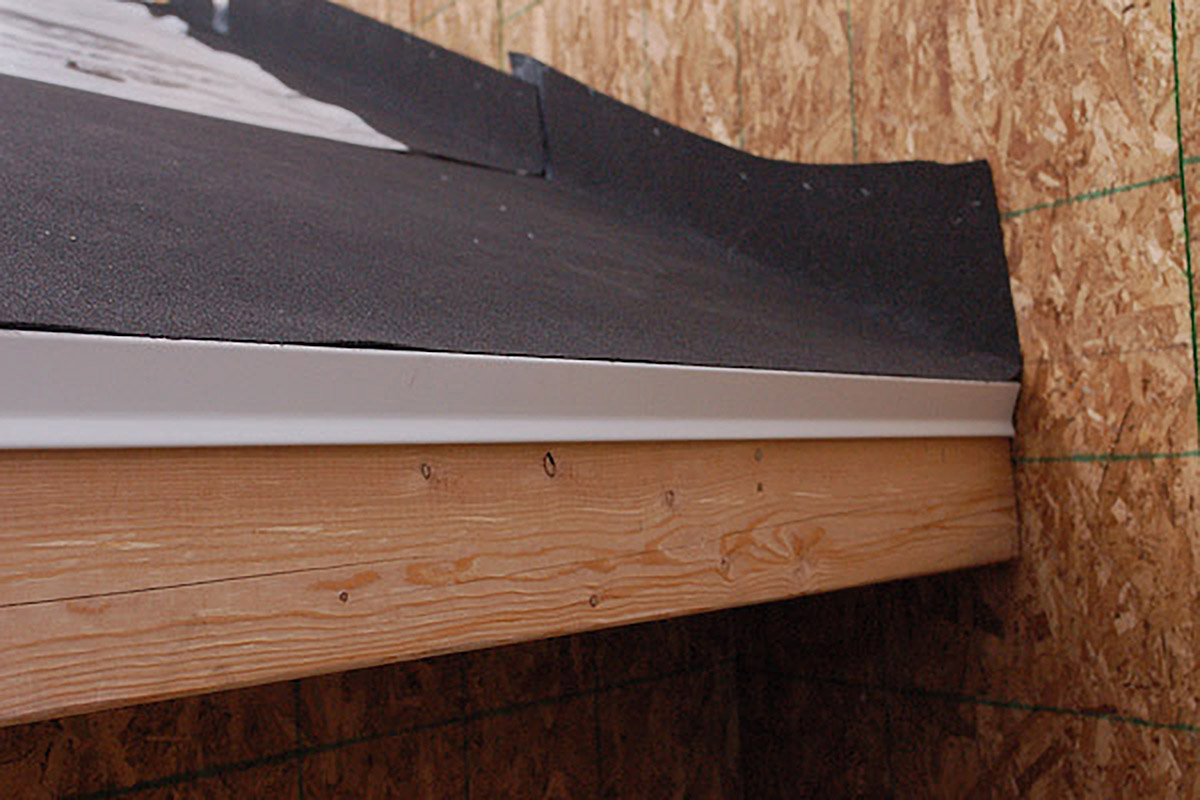
A drip edge is a metal sheet, usually shaped like an “L,” installed at the edge of the roof. Also called drip edge flashing or D-metal, it serves a vital function by directing water away from the fascia and into the gutter. Without a drip edge, water may end up beneath the shingles and may cause damage to various parts of the home. Though your home may not have originally had a drip edge installed, drip edges are now required by most building codes across North America to protect homes from damage.
What’s the Purpose of a Roof Drip Edge?
A drip edge on a roof has two key purposes:
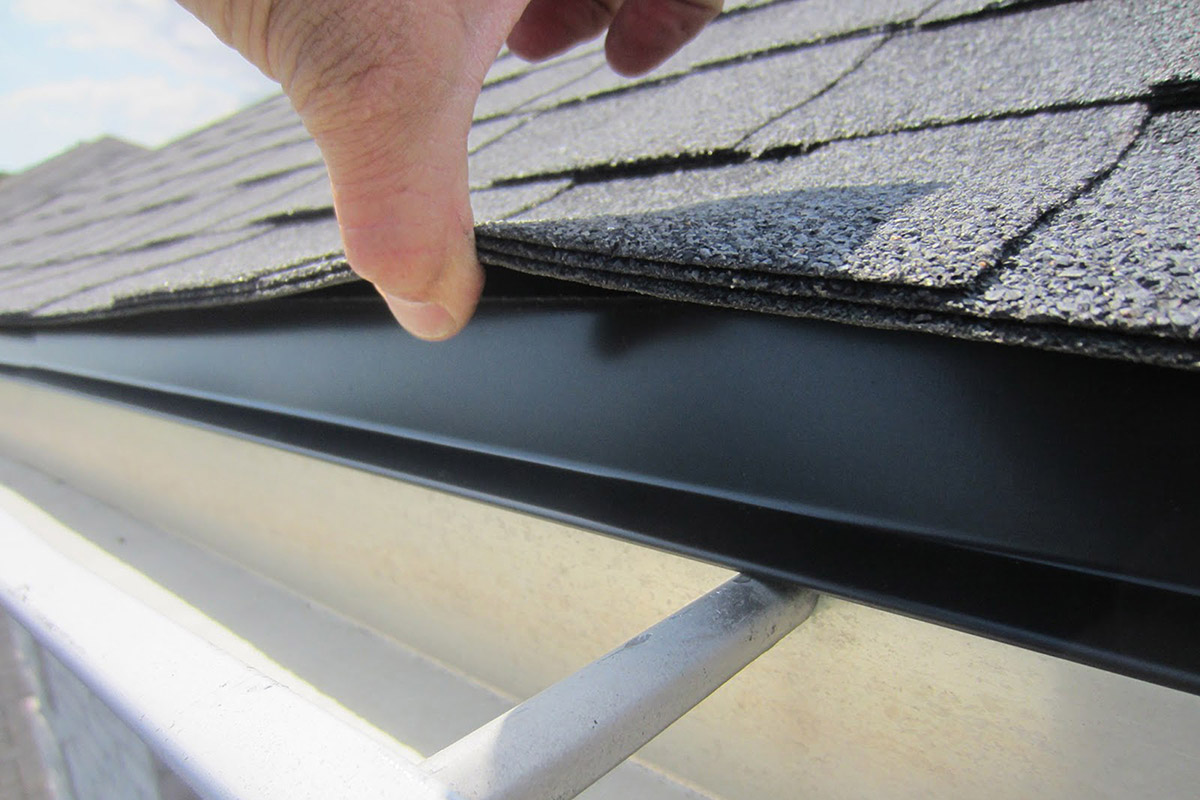
- Direct water away from fascia: Due to cohesion, surface tension and other forces, water droplets tend to stick to one another and to the surfaces they are on, albeit slightly. A drip edge is designed to take advantage of those forces and, along with gravity, direct water into the gutter. If the home has no gutter, the drip edge will prevent the water from running down the fascia and onto or into the soffit cavity. However, without the drip edge, the water sticks to shingles, potentially working its way under the shingles to cause a leak. For example, water may cling to the fascia, which may cause rot, or, in severe conditions, a leak into the home.
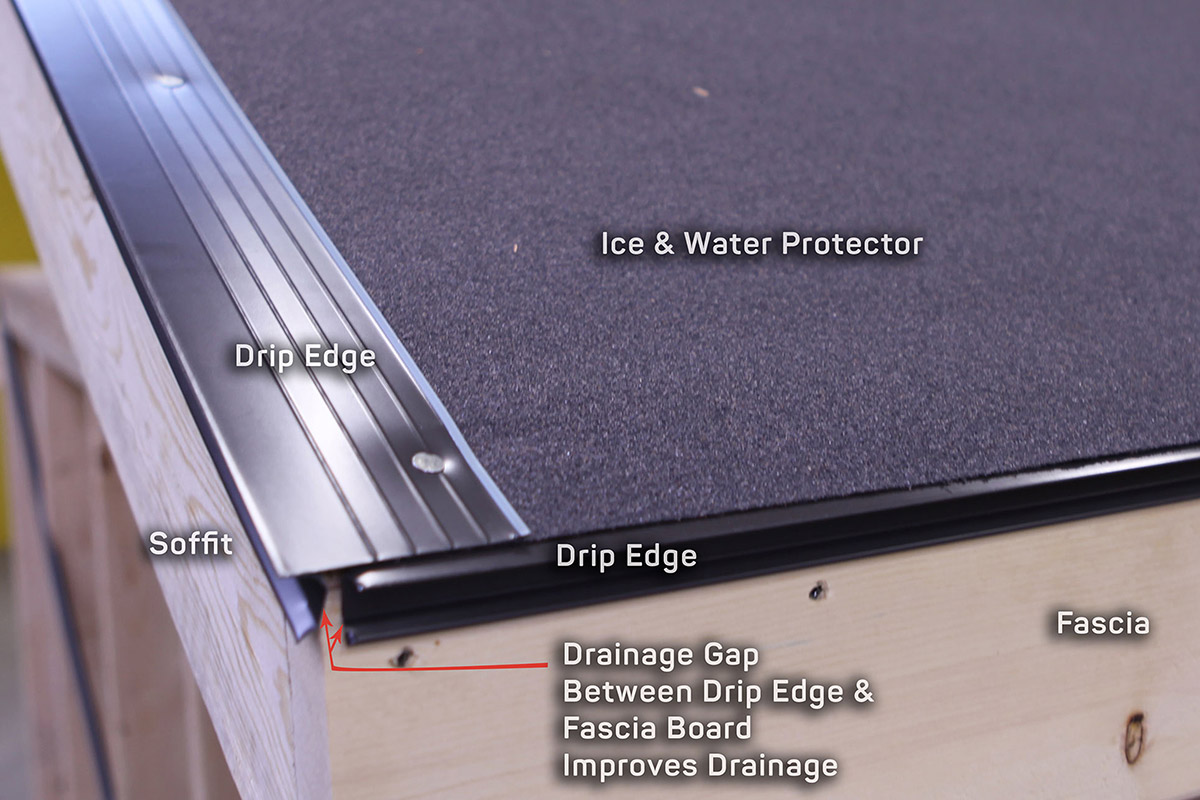
- Protect from wind-driven rain: When conditions are serious, the wind pushes water around on a roof. Shingles, along with underlayments and ice and water protector, keep wind-driven rain from harming the roof’s deck. However, the drip edge must compete with the wind on the edges. Wind can easily push the water upwards before gravity pulls the water down. The drip edge needs to hang significantly off the edge of the roof and has two to four inches of lower flange to combat this. And, of course, without any drip edge at all, wind‐driven rain could compromise the roof.
Drip Edge Material Types
Roof drip edges are made of various plastics and metals, which are both acceptable under most building codes as long as the metals are corrosion-resistant or galvanized.
- Aluminum: A common material for drip edges, aluminum isn’t as strong as steel. It doesn’t corrode and is often sold in colors that match the rest of the home.
- Galvanized steel: Drip edges are designed to be in contact with water; so, if they are made of steel, they need to be galvanized to prevent rust. Minimum 24-gauge steel is preferable so that the drip edge can withstand strong winds.
- Copper: Copper is a sturdy metal that gives a roof a unique look. When used as a drip edge, it should be a minimum of 0.69 mm or 20 ounces.
While plastic, vinyl and fiberglass roof drip edges may also be available in your area, these materials are best suited for use in nonroofing applications, such as above doors and windows.
Drip Edge Profile Types
There are three basic profiles of drip edge flashing, but each goes by more than one name, which can be confusing.
- Type C: This is the classic “L”-shaped drip edge, sometimes called “L style.” This drip edge is bent to a 90-degree angle and has a lower flange at the bottom.
- Type D: This profile of drip edge is shaped like a “T,” with a lower flange at the bottom. Sometimes it is called drip metal, “D-metal” or “T style.” The Asphalt Roofing Manufacturers Association (ARMA) prefers this drip edge profile to Type C because it keeps the water further away from the fascia. However, Type C is still acceptable according to most building codes.
- Type F: This is an extended drip edge that has a longer leading edge, which is useful when installing new drip edges over existing shingles or on rake edges. This profile is frequently called “F style” or “gutter apron.”
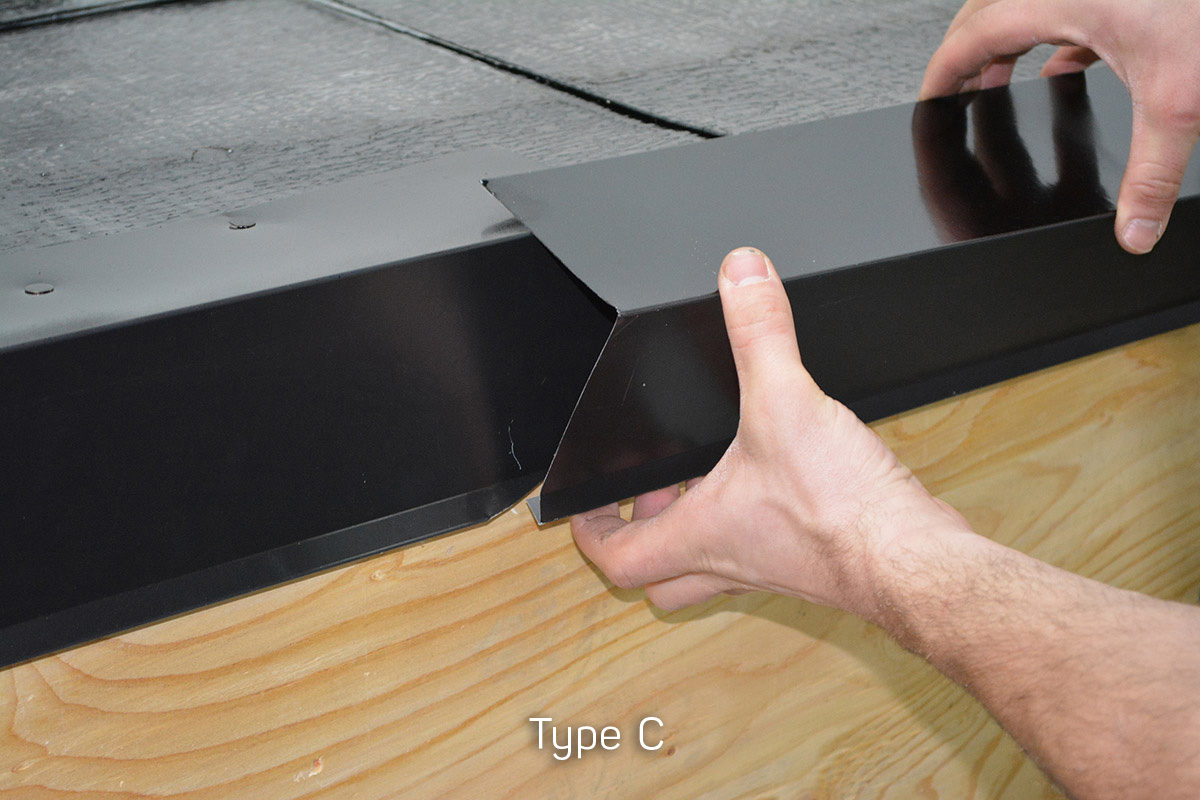
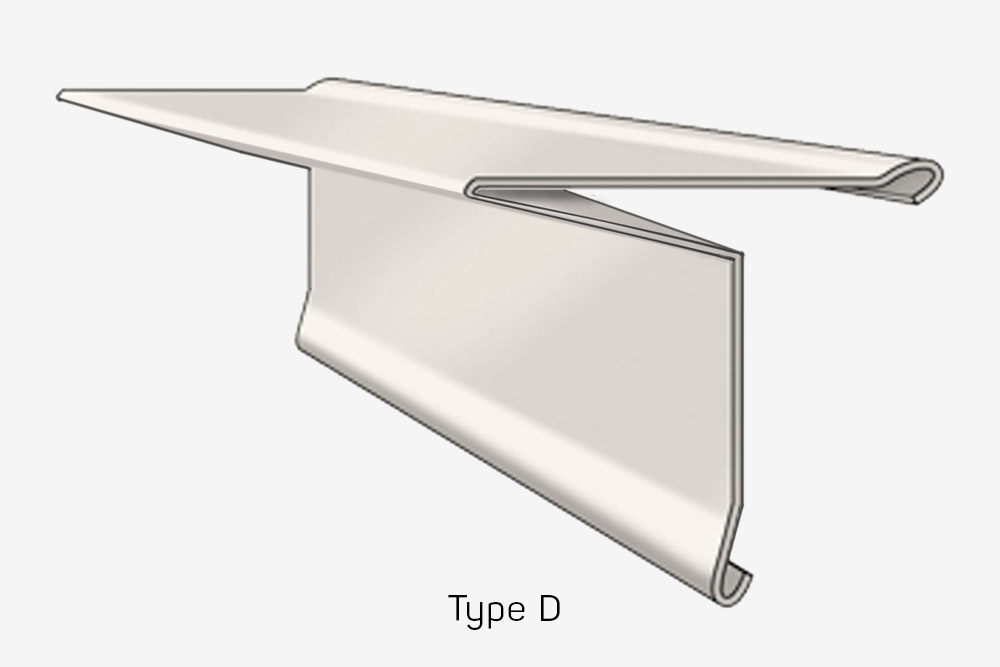
Roof drip edges are generally sold in 10.5-foot lengths, but they are occasionally sold in 8-foot lengths or smaller. The length of the overhang itself commonly ranges from 2 to 5 inches. You may find other styles and sizes of drip edges in the store, including “J-channel” drip edges, but these are intended for windows, doors and other applications. You may also find vented drip edges, but the National Roofing Contractors Association (NRCA) does not recommend using them on roofs.
How to Install a Drip Edge
It’s important to understand that drip edge flashing installation is different for eaves and rakes. After your roof deck has been prepared, and before you install underlayment, you need to install drip edges at the eaves. You install drip edges on the rakes after you install the underlayment. Plus, this step-by-step guide to roof drip edge installation will also explain how to cut drip edges for corners and peaks.
- Step One: If using a Type C drip edge, you can install a furring strip to enhance performance. A furring edge is a strip of one-by-two wood you install on the vertical surface of the house just beneath the roof’s edge. When you install the drip edge over this strip, it keeps the lower flange further from the home’s siding, which helps to keep water away from the home.
- Step Two: Install drip edges on the eaves first. Place the drip edge down, aligning it so water will drip into the gutters. The end with the flange or flare should point down and away from the roof.
- Step Three: Use roofing nails to secure the drip edge on the roof. Nail high up on the drip edge so that the shingles will cover the nails. Ideally, you’d nail about every 12 inches, and in no circumstances should you have 16 inches or more between nails. When you place the next drip edge piece, it should overlap the first by an inch.
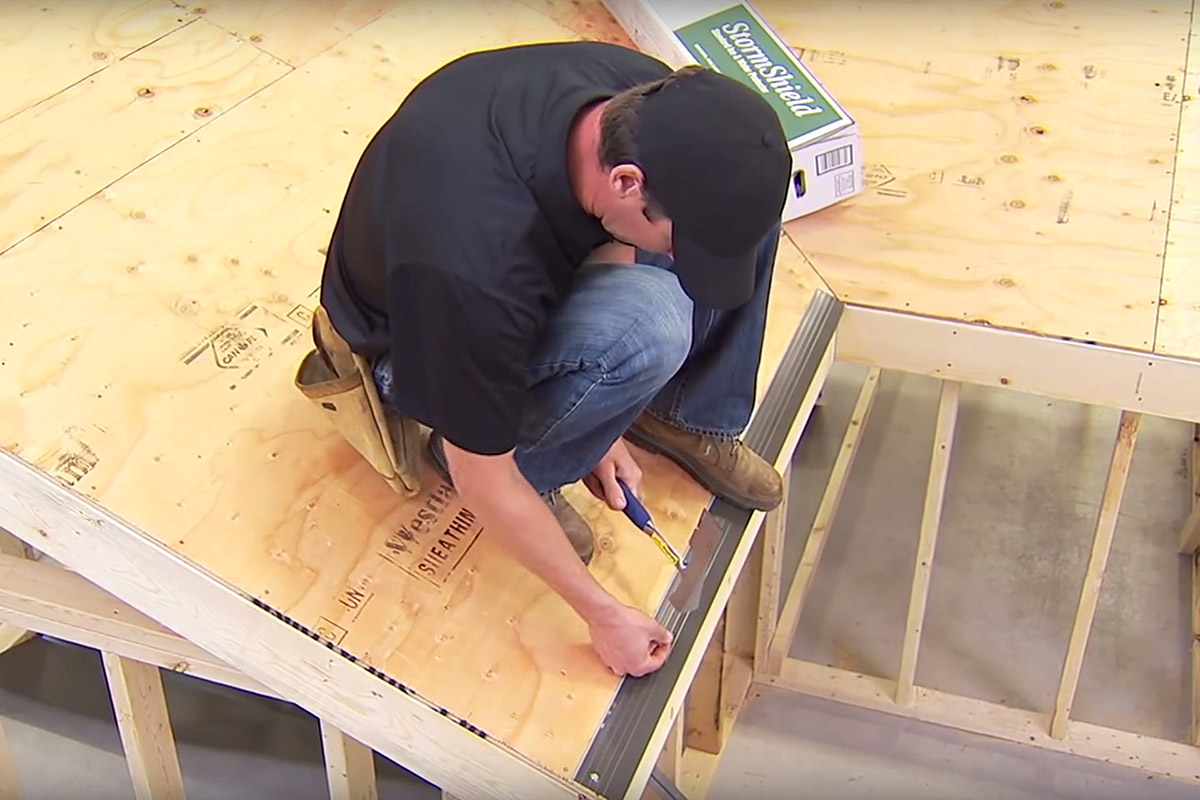
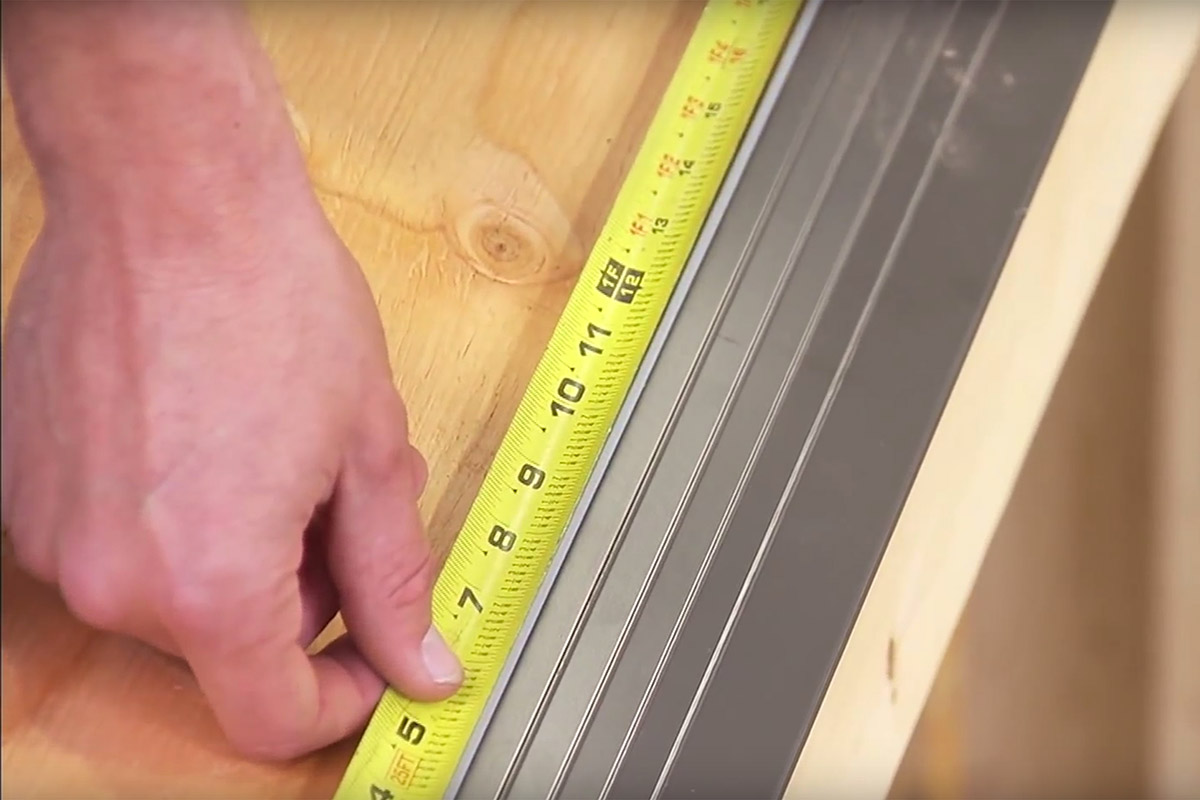
- Step Four: When you reach a corner where an eave and rake edge meet, you need to make a cut to ensure a proper fit. First, place your drip edge on the rake edge. Mark where the drip edge begins to overhang and one inch further out from that overhang.
- Step Five: Cut the entire drip edge by your second mark, so that it only hangs past the edge by an inch. Then, cut out the topmost portion of the drip edge by your first mark. Then, make a perpendicular cut, so that you can remove a square of the drip edge, as you see in the image below.
- Step Six: Install the drip edge as normal. Then, bend in the flap of the drip edge to form a corner. You will complete this corner when you install the drip edges on the rakes.
Image provided by CASMA - Step Seven: Once you’ve covered the eaves with a drip edge, it’s time to install your underlayment. This way, the underlayment is over the drip edge on the eaves, but under the drip edge on the rakes.
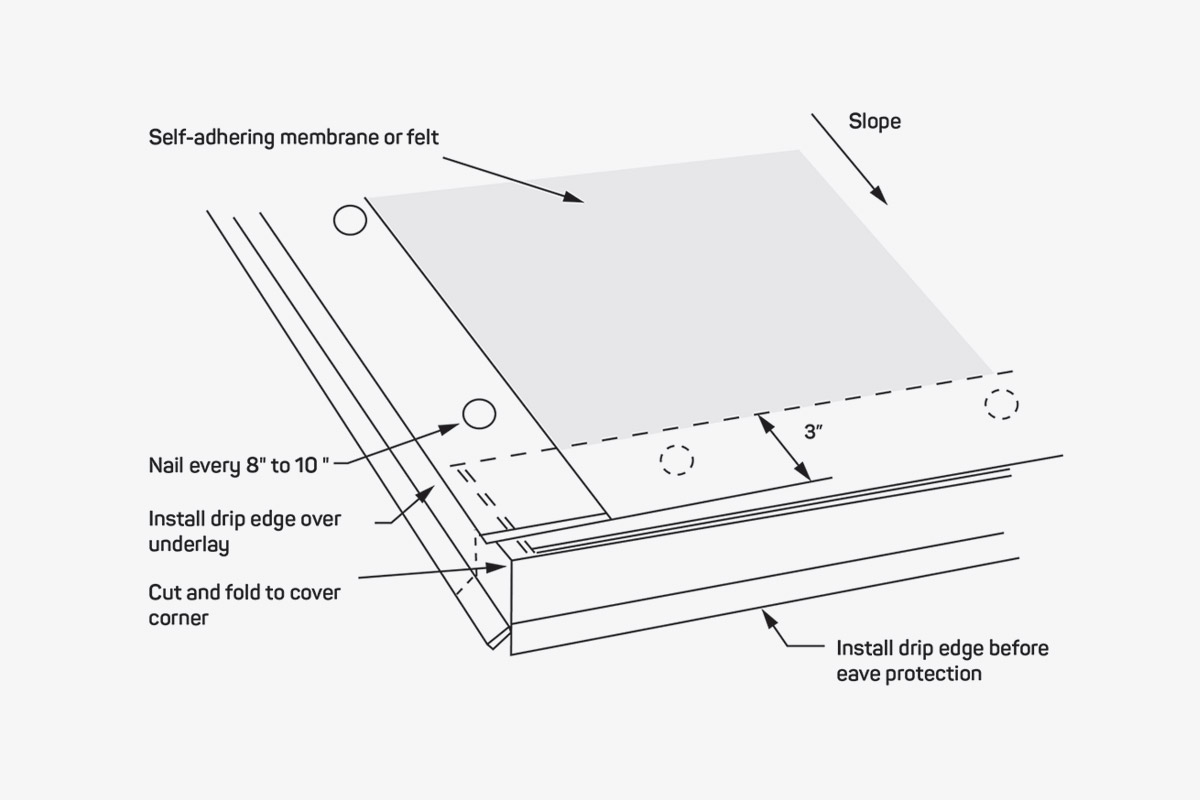
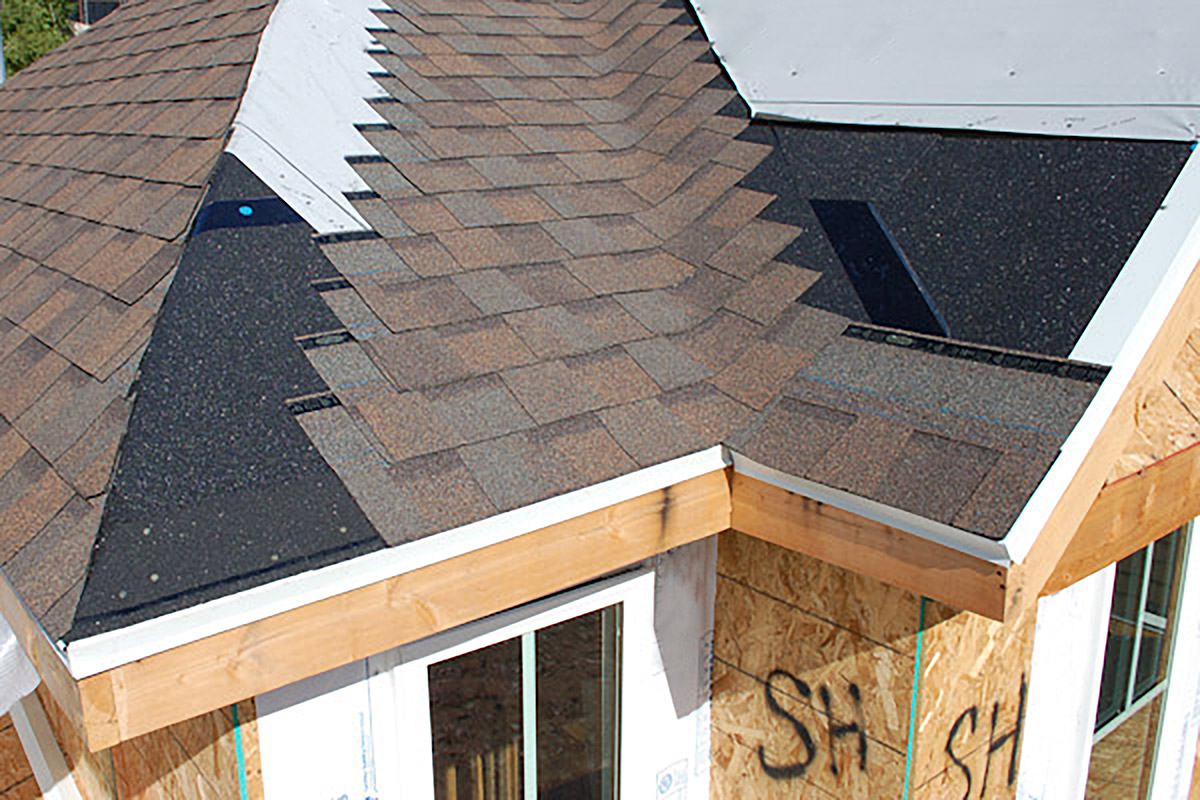
Image provided by CASMA
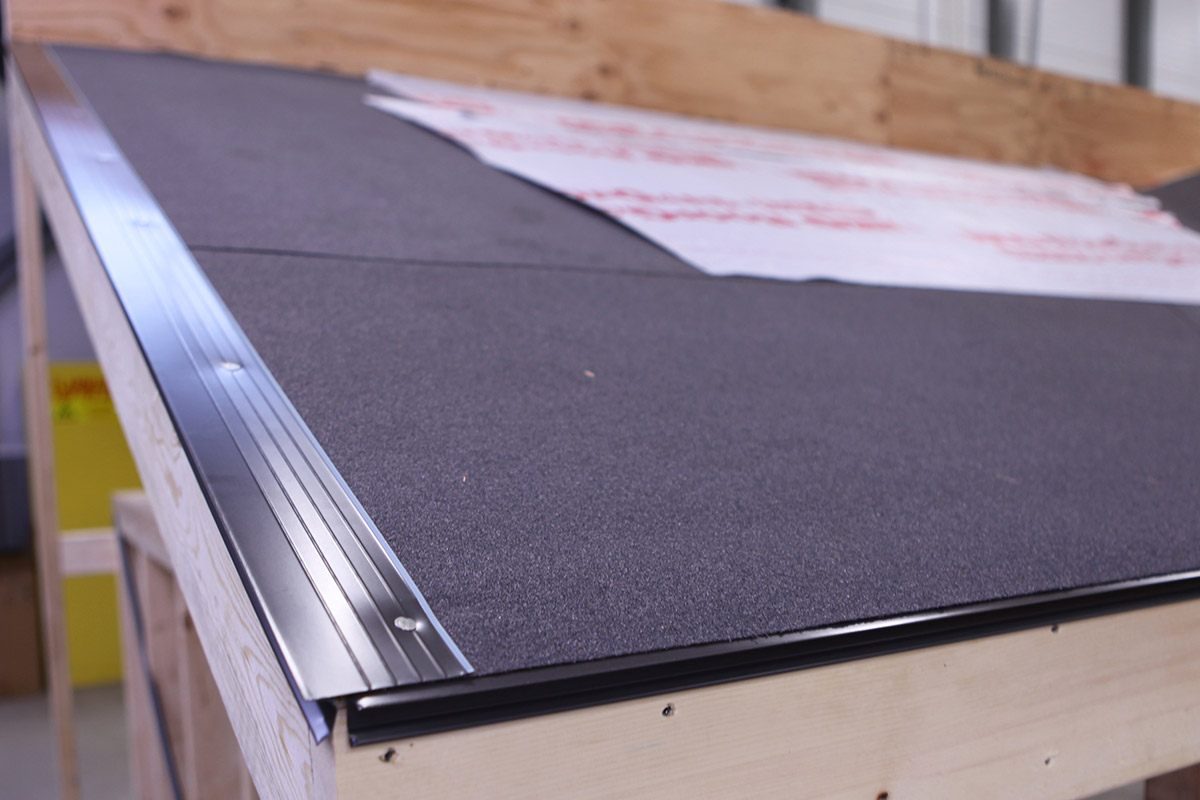
- Step Eight: Then, install drip edges on the rakes. Use nails as before.
- Step Nine: When you get to a corner where the rake and eave edge meet, simply install the rake’s drip edge on top of the flap you left when installing the eave’s drip edge.
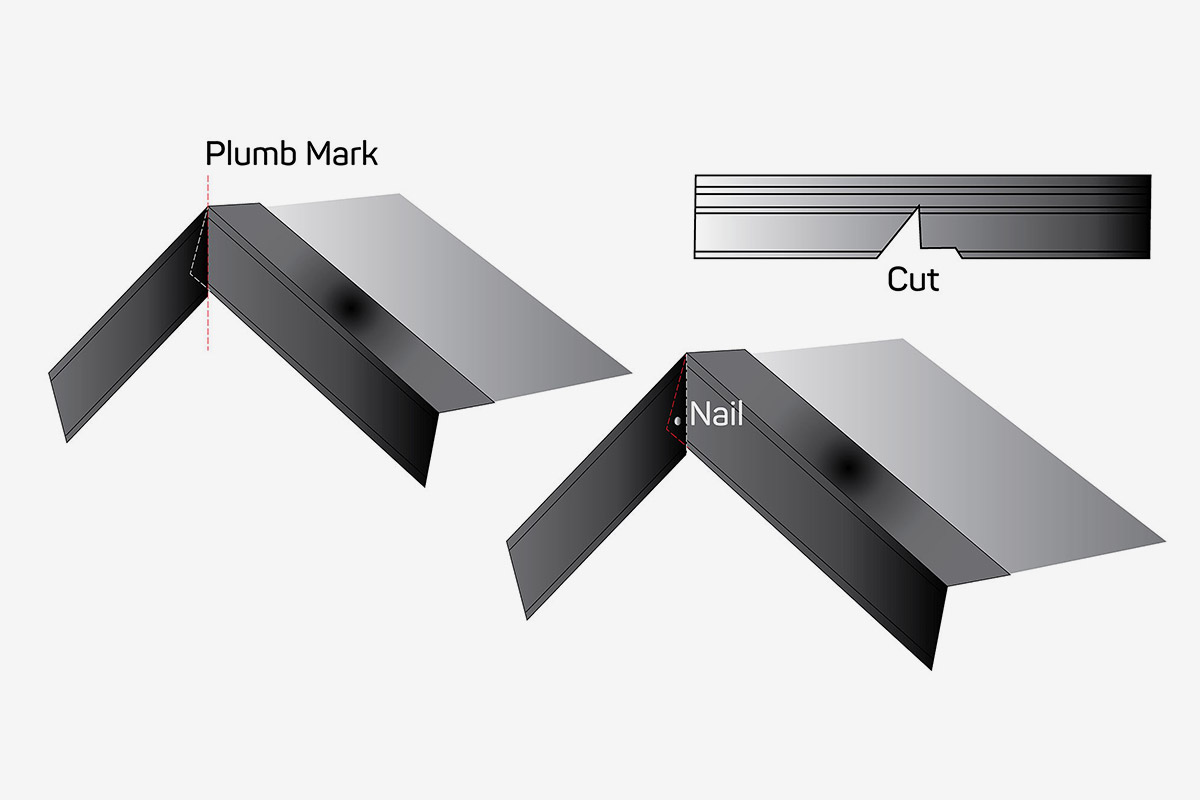
- Step Ten: When you reach the roof’s ridge, you need to make yet another cut in your drip edge. Hold the drip edge up to the ridge and make a mark along where the drip edge exceeds the roof. Make a straight cut through the bottom of the drip edge with your tin snips.
- Step Eleven: Fold the drip edge to fit over the ridge. Mark the plumb line, or centerline, as in the image below. Cut the topmost part of the drip edge along this line to create a finished look. Place a single nail in the outside piece to hold the drip edge in place.
You should always check with your local building code to see if there are any extra rules you are required to follow during drip edge installation.
How to Replace a Drip Edge on an Existing Roof
What if you need to replace the drip edge flashing on an existing roof or install a drip edge on an existing roof for the first time? It can be done; here’s how:
- Step One : Gently lift up the shingles on the edge of the roof and locate the nails holding the existing drip edge onto the roof.
- Step Two : Use a flat pry bar and hammer to pry the nails out of the drip edge gently.
- Step Three : Once free, slide the drip edge out and discard.
- Step Four : Install the new drip edge as described above, with cement and nails. You’ll need to ask another roofing professional to hold up the shingles while you do so.
Just as with installing drip edges on new roofs, you should check with your local building codes to see if there are special rules you have to follow about drip edge replacement.
In years past, many building codes did not require drip edges on roofs; but the roofing community realized that these relatively inexpensive products make a big difference in the roof’s performance. By installing drip edges on roofs properly, you’ll be providing your customers a better roofing system.
If you’ve discovered that your roof is missing a drip edge, or has a damaged drip edge, you should get in touch with a roofing contractor through our Roofing Contractor Locator to get professional advice.
Check out our Blueprint for Roofing videos for more information on drip edge installation and other roofing topics.
FAQ
1. What is a drip edge on a roof?
A drip edge is a piece of flashing installed on the edge of a roof to direct water away from the fascia and into the gutter so that it travels away from the foundation of your home.
2. Is drip edge necessary?
Most building codes across North America require roofing drip edge. Even if drip edge is not required in your region, installation is still recommended to protect from water intrusion. Check with your local building codes to see if roofing drip edge is required where you live.
3. What happens if you don’t put a drip edge on a roof?
Since drip edge flashing helps protect your home by sealing the gap between the fascia and decking, its absence can allow for intrusions. Without drip edge, water can seep under your shingles, which can lead to roof deck deterioration. If the water continues to sit, it can eventually lead to leaks and other expensive damage. Having drip edge on your roof can also help protect against uninvited critters from entering your home.
4. What is the difference between roof flashing and drip edge?
Drip edge is a type of metal flashing installed specifically on the edges of the roof. Roof flashing is used to direct water away from critical areas where the roof plane meets a vertical surface, such as around chimneys, skylights, vents, and other roof penetrations. A drip edge is installed on the edges of the roof to direct water away from the fascia and soffit. Learn more about roof flashing here.
5. Can you replace drip edge without removing shingles?
Drip edge can be replaced without removing the roof shingles. This technique is easier achieved with two sets of hands. One roofer will hold up the existing shingles while the other uses a flat pry bar and hammer to remove the nails from the old drip edge and install the new one. As you would with installing new drip edge on a roof, it is important to check your local building codes for regional rules when replacing old drip edge flashing. Check out our Contractor Directory to find a ROOFPRO who can replace your drip edge.
